Second Diy Short Shag Haircut: The Easiest Way To Get The Look
Title: Second DIY Short Shag Haircut: The Easiest Way to Get the Look
Introduction:
The shag haircut has been making a comeback in recent years, and for good reason. It's a versatile style that can be dressed up or down, and it's flattering on a variety of face shapes. If you're thinking about giving the shag a try, but you're not sure how to do it yourself, this blog post is for you.
In this post, I'll walk you through the steps on how to do a DIY short shag haircut. I'll provide detailed instructions, as well as tips and tricks to help you get the perfect look.
Main Content:
Step 1: Gather your supplies.
The first step is to gather your supplies. You'll need:
- A pair of sharp haircutting shears
- A comb
- A blow dryer
- A texturizing spray
- Hairspray
Step 2: Wash and condition your hair.
Start by washing and conditioning your hair as usual. This will help to detangle your hair and make it easier to work with.
Step 3: Section your hair.
Once your hair is dry, you'll need to section it into four sections. You can use clips or hair ties to hold the sections in place.
Step 4: Start cutting.
The first step is to cut the layers in the back of your hair. Start by cutting the bottom layer to the desired length. Then, cut the next layer up a few inches, and so on. As you're cutting, use your comb to keep the layers separated.
Step 5: Cut the layers in the front.
Once you've cut the layers in the back, you can move on to the layers in the front. Start by cutting the bangs to the desired length. Then, cut the layers around your face to frame your features.
Step 6: Add texture.
Once you've cut all of the layers, you can add texture to your hair. Use a texturizing spray to create a tousled, shaggy look.
Step 7: Blow-dry and style.
Finally, blow-dry your hair and style it with a texturizing spray. You can use your fingers to tousle your hair and create a more natural look.
Conclusion:
That's it! You've now learned how to do a DIY short shag haircut. With a little practice, you'll be able to create the perfect shaggy look in no time.
Are you looking to give yourself a short shag haircut? If so, you've come to the right place! We've put together a comprehensive guide on how to do it yourself, step-by-step.
In this guide, we'll cover everything you need to know, from choosing the right haircut for your face shape to styling your new shag 'do. We'll also provide you with a list of supplies you'll need, as well as some helpful tips and tricks.
So whether you're a beginner or a seasoned pro, our guide has something for you. And if you have any questions, be sure to visit our website for more information.
FAQ of diy short shag haircut
- Q: What are the benefits of a DIY short shag haircut?
A: There are many benefits to giving yourself a DIY short shag haircut. First, it can save you money on a salon visit. Second, it can give you more control over the haircut, allowing you to customize it to your own style and preferences. Third, it can be a fun and rewarding experience to learn how to cut your own hair.
- Q: What are the tools and supplies I need for a DIY short shag haircut?
A: The basic tools and supplies you will need for a DIY short shag haircut are:
* A pair of sharp scissors
* A comb
* A texturizing shear (optional)
* A razor (optional)
* A cape (optional)
* Hair clips
* Hairspray
- Q: How do I cut my hair into a short shag style?
A: There are many different ways to cut your hair into a short shag style. Here is a basic tutorial:
1. Start by dividing your hair into four sections: front, top, right side, and left side.
2. Cut the front section into a blunt, straight line.
3. Cut the top section into layers, starting with the longest layers in the back and working your way forward.
4. Cut the right and left side sections into layers, following the same pattern as the top section.
5. Use a texturizing shear or razor to add texture to the layers.
6. Style your hair with hairspray.
- Q: What are some tips for styling a short shag haircut?
A: Here are some tips for styling a short shag haircut:
* Use a texturizing spray to add volume and texture to your hair.
* Blow-dry your hair with a round brush to create tousled waves.
* Use a headband or bandana to hold your bangs back.
* Add a few pieces of hair to your face to frame your features.
- Q: What are some common mistakes to avoid when giving yourself a DIY short shag haircut?
A: Here are some common mistakes to avoid when giving yourself a DIY short shag haircut:
* Cutting your hair too short.
* Not cutting your hair evenly.
* Not adding enough texture to your hair.
* Not styling your hair properly.
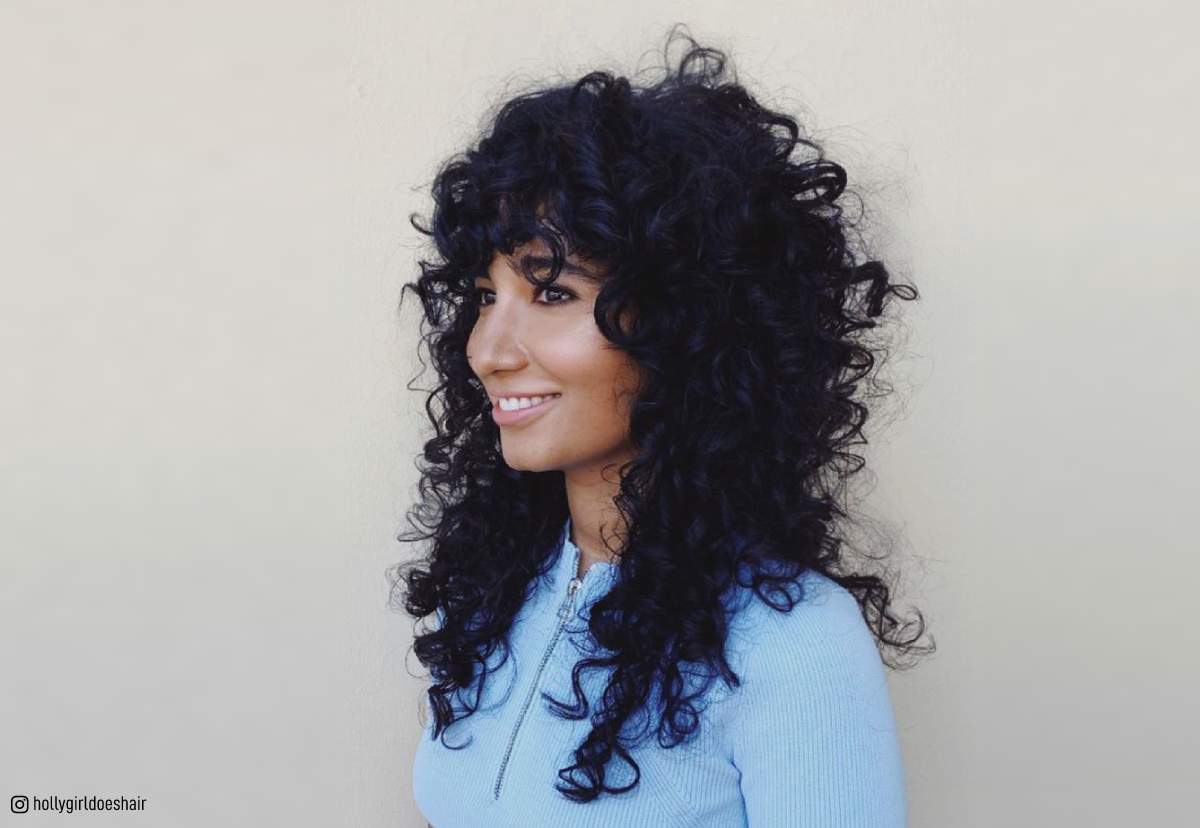
Image of diy short shag haircut
- Short layered shag with blunt bangs

- Short textured shag with wispy bangs
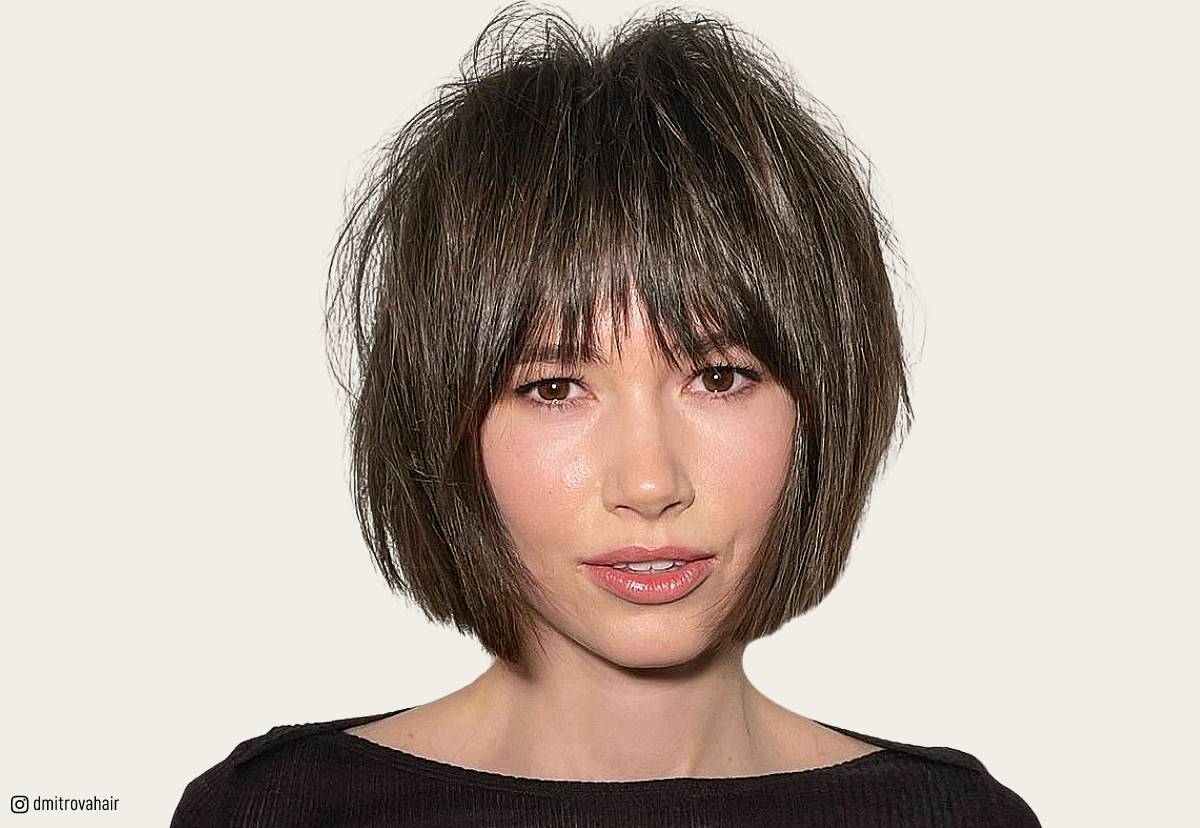
- Short choppy shag with curtain bangs

- Short layered shag with side-swept bangs

- Short textured shag with no bangs
- Short asymmetrical shag

- Short blunt shag

- Short layered shag with waves

- Short textured shag with curls
Post a Comment for "Second Diy Short Shag Haircut: The Easiest Way To Get The Look"